Top Google Forms Tips to Enhance Your Data Collection
Google Forms is a versatile tool for creating surveys, quizzes, and forms to collect data efficiently. As a Digisoft Google Workspace Premier Partner, we’re excited to share some essential tips to help you maximize the functionality and productivity of Google Forms. Whether you’re using it for business, education, or personal use, these tips will ensure you get the most out of this powerful tool.
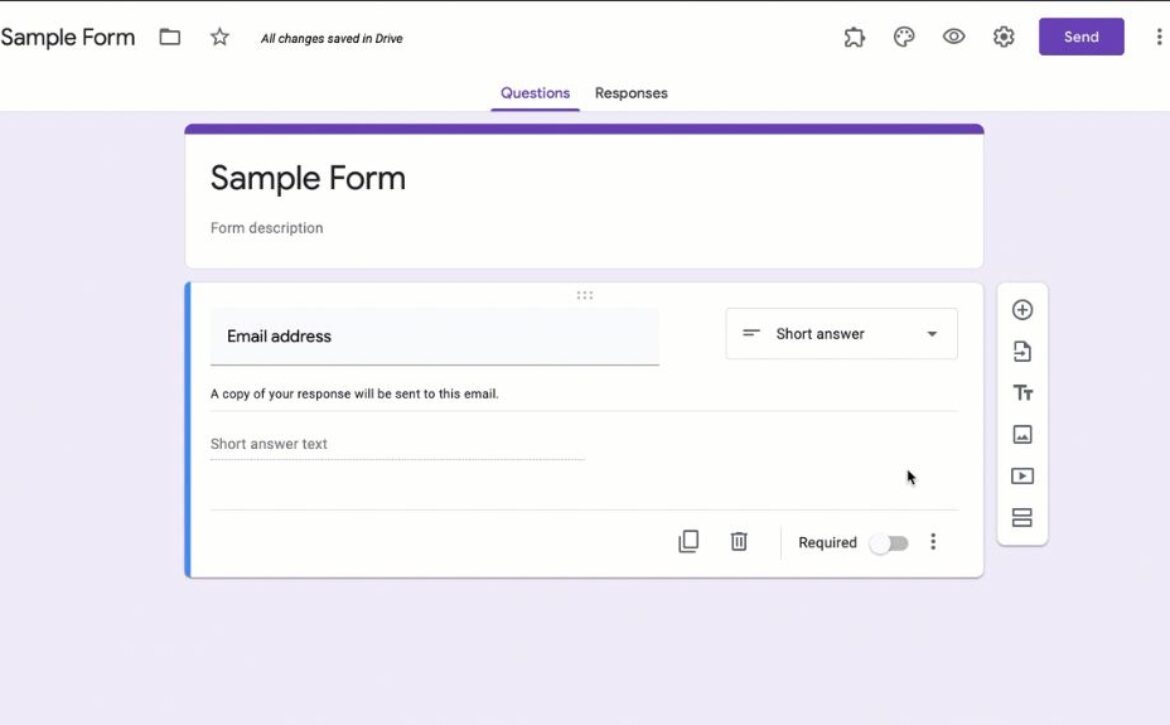
Personalizing the theme of your Google Form can make it more engaging and professional. You can customize colors, fonts, and images to match your brand or the purpose of the form.
How to Customize Your Form Theme:
- Open Google Forms.
- Click on the “Palette” icon in the top-right corner.
- Choose a theme color and background color.
- Click “Choose image” to add a custom header image.
- Select your preferred font style.
Breaking your form into sections can make it easier for respondents to navigate, especially for longer surveys or questionnaires.
How to Add Sections:
- Open your Google Form.
- Click on the “Add section” button (two vertical lines) in the toolbar.
- Name your section and add relevant questions.
Response validation ensures that the data you collect is accurate and meets specific criteria. You can set rules for number ranges, text formats, and more.
How to Enable Response Validation:
- Open your form and select a question.
- Click on the “More options” icon (three dots) at the bottom-right of the question.
- Select “Response validation.”
- Set the criteria (e.g., number range, text length) and add a custom error message.
Enhance the functionality of your Google Forms with add-ons. These tools can help you automate workflows, grade quizzes, and more.
Recommended Add-ons:
- FormLimiter: Automatically close forms after a certain number of responses.
- FormRecycler: Reuse questions from previous forms.
- Certify’em: Create and send certificates for quiz completions.
Google Forms allows you to collect file uploads from respondents, which is useful for gathering documents, images, or other files.
How to Collect File Uploads:
- Open your form and add a new question.
- Select “File upload” as the question type.
- Customize the file type and size limits.
- Add instructions for respondents.
Conditional logic (also known as “branching”) lets you show or hide questions based on previous answers. This makes your form more dynamic and tailored to each respondent.
How to Set Up Conditional Logic:
- Open your form and add a new section.
- Click on the question you want to base the logic on.
- Click on the “More options” icon (three dots) and select “Go to section based on answer.”
- Choose the sections corresponding to each answer.
Integrate Google Forms with Google Sheets to automatically collect and analyze responses in real-time. This integration makes it easy to manage and visualize your data.
How to Integrate with Google Sheets:
- Open your form and click on the “Responses” tab.
- Click on the green Sheets icon.
- Choose to create a new spreadsheet or select an existing one.
- Click “Create” or “Select.”
Pre-filled links allow you to provide respondents with a form that already has some answers filled in. This is useful for saving time and ensuring consistency.
How to Create Pre-Filled Links:
- Open your form and click on the “More” icon (three dots) in the top-right corner.
- Select “Get pre-filled link.”
- Fill in the answers you want to pre-fill and click “Get link.”
- Copy and share the link with your respondents.


